
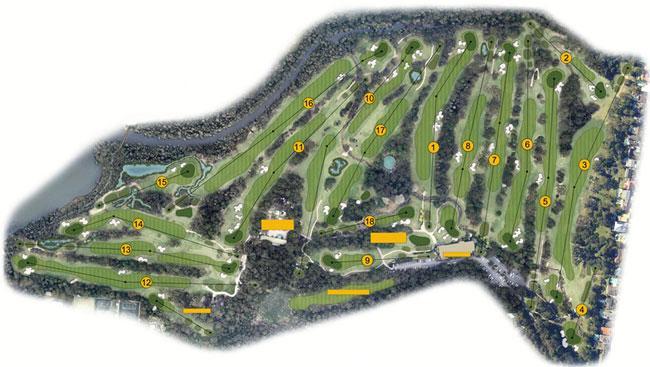
Course Tour
MEN: 5990 Metres Par 70 SR 73.0
LADIES: 5302 Metres Par 72 SR 75.0
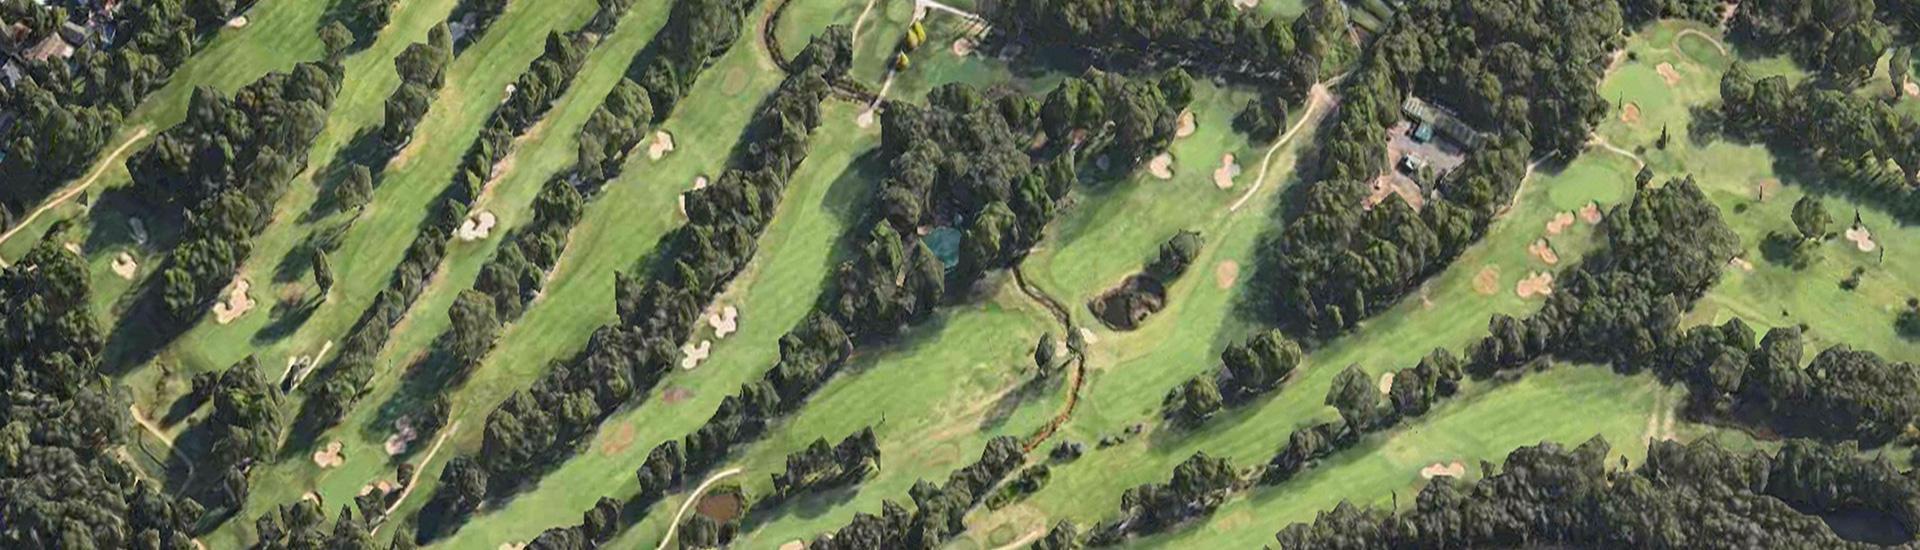
Cromer is one of the leading golf courses in Sydney with a championship course, recently redesigned by leading course architect, James Wilcher. Cromer Golf Club offers a wonderful golf course and you are invited to experience it as a member, a guest of a member or a corporate golf participant.
Click on the hole numbers above for a description of each hole.
The 1st hole is a warm welcome to Cromer with its tall imposing trees and narrow fairway. From the tee, bunkers guard the right hand side of the fairway. Long hitters ideally fade off the left side of the bunkers, leaving a short iron to the green. A small pond, short and to the right, guards any loose shots.
The green is long and well bunkered to the left.
Please turn up your volume and click on play to hear how to play this hole:
Cromer Golf Club Course Tour – 1st Hole from Cromer Golf on Vimeo.
| Hole 1 Details | |
|---|---|
| Metres | Par |
| 359 | 4 |
This uphill and long Par 3 is protected by two deep bunkers at the front, and one shallower bunker long and to the left. The Green is long and set at an angle, making a high and soft landing shot the ideal tee shot here.
The green holds many late breaking, and quick, putts if left above the hole. Shots left below the hole on this green will score best.
Please turn up your volume and click on play to hear how to play this hole:
Cromer Golf Club Course Tour – 2nd Hole from Cromer Golf on Vimeo.
| Hole 2 Details | |
|---|---|
| Metres | Par |
| 180 | 3 |
An ideal tee shot will start to the right side of the fairway and gently draw, making the most of the down-slope on the fairway. A strong tee shot landing on the right side can result in balls feeding to the bottom of the hill, leaving a mid to short iron in for the second shot. Players failing to reach the 200m post on the fairway, would be best advised to lay up short of the creek. From there the approach is relatively straight forward.
The 3rd green breaks very little and offers excellent putting opportunities for birdies or better.
Please turn up your volume and click on play to hear how to play this hole:
Cromer Golf Club Course Tour – 3rd Hole from Cromer Golf on Vimeo.
|
Hole 3
The “Waterfall hole” demands an accurate tee shot. Careful club selection is required to carry a meandering creek that guards the entire front of the green. Details |
|
|---|---|
| Metres | Par |
| 445 | 5 |
The Waterfall hole demands an accurate tee shot. Careful club selection is required to carry a meandering creek that guards the entire front of the green.
The green has many subtle breaks and combined with shadows from the overhanging trees, makes for some interesting putting.
Please turn up your volume and click on play to hear how to play this hole:
Cromer Golf Club Course Tour – 4th Hole from Cromer Golf on Vimeo.
| Hole 4 Details | |
|---|---|
| Metres | Par |
| 135 | 3 |
One of the most demanding tee shots awaits here. The landing area on this long hole slopes to the left and is protected by a large fairway bunker. Balls ending up in the bunker will almost certainly prevent players from reaching the green in two shots. Long hitters can carry the fairway bunker, with the left side of the fairway being ideal to approach the green. Caution with the 2nd shot, as the trees on the right side overhang the fairway and can easily catch a loose shot.
The green is long and guarded by two bunkers to the right. Putting is relatively straight forward with gentle breaks.
Please turn up your volume and click on play to hear how to play this hole:
Cromer Golf Club Course Tour – 5th Hole from Cromer Golf on Vimeo.
| Hole 5 Details | |
|---|---|
| Metres | Par |
| 416 | 4 |
A slight dogleg-right hole is well guarded by a right side fairway bunker. Ideal tee shots will play to the centre or left centre of the fairway to avoid the bunker.
The long and narrow green is guarded by bunkers to the left and long right. A lateral hazard guards the back of the green.
Please turn up your volume and click on play to hear how to play this hole:
Cromer Golf Club Course Tour – 6th Hole from Cromer Golf on Vimeo.
| Hole 6 Details | |
|---|---|
| Metres | Par |
| 372 | 4 |
An accurate tee shot is required here and will be rewarded with a short second shot to the green. The fairway is bunkered left and right.
A well bunkered and long green helps protect the par of this hole. Careful club selection to the correct section of the green is needed here to avoid long and sloping putting.
Please turn up your volume and click on play to hear how to play this hole:
Cromer Golf Club Course Tour – 7th Hole from Cromer Golf on Vimeo.
| Hole 7 Details | |
|---|---|
| Metres | Par |
| 362 | 4 |
Once again the premium is on straight hitting from the tee. Avoid the bunkers right and left of the fairway. Once on the fairway, players are faced with a water carry, with a creek that extends short and to the left of the green. Pin positions in the back left area of the green require precise shots, as the bank slopes left towards the awaiting creek. Bunkers surround the right side and long of the green.
Careful club selection is needed here to avoid lengthy putting, as the green is long and narrow.
Please turn up your volume and click on play to hear how to play this hole:
Cromer Golf Club Course Tour – 8th Hole from Cromer Golf on Vimeo.
| Hole 8 Details | |
|---|---|
| Metres | Par |
| 351 | 4 |
This is a very strong and uphill par 3. Shots played to the left, and front of the green, will generally feed down to the front of the green. The green is well bunkered to the right of the green. A single bunker also sits to the back left area of the green.
The 9th green is arguably one of the most difficult on the course. The green slopes heavily from left to right, with a lengthy tier through the middle. Balls finishing on the front of the green will require a majestic touch to two-putt to any of the back pin positions.
Please turn up your volume and click on play to hear how to play this hole:
Cromer Golf Club Course Tour – 9th Hole from Cromer Golf on Vimeo.
| Hole 9 Details | |
|---|---|
| Metres | Par |
| 178 | 3 |
The 10th tees-off from a highly elevated teeing ground. Sweeping views of the course below are to be enjoyed here before striking an accurate tee shot. This hole will test one’s best course management skills, as hazards guard every aspect of play here. A tee shot to the left of the fairway is ideal, as this will avoid a large pond to the right and open up the fairway for a second shot.
A hazard winds across the fairway and continues along the left side of the fairway, creating difficulties for second shots. Once the meandering hazard is negotiated, a pond short and to the right of the green sits hidden behind a couple of fairway bunkers. Another pond awaits for stray shots well right, and short of the green. The green is bunkered its entire length to the right.
The green is of medium size and will not cause great difficulties once there. Par is always a welcome score here.
Please turn up your volume and click on play to hear how to play this hole:
Cromer Golf Club Course Tour – 10th Hole from Cromer Golf on Vimeo.
| Hole 10 Details | |
|---|---|
| Metres | Par |
| 503 | 5 |
This par 4 requires a strong tee shot, ideally with a slight right-to-left shape to follow the gentle dogleg of the fairway. A bunker guards the right side of the fairway for longer hitters. Play to the elevated green needs to avoid a line of bunkers short and to the right, with a severe drop off to the right of the green making a save for par more difficult.
A long green, angled from the left to right, provides the finishing touches to this par 4. Late-breaking, and very quick, downhill putts protect par here.
Please turn up your volume and click on play to hear how to play this hole:
Cromer Golf Club Course Tour – 11th Hole from Cromer Golf on Vimeo.
| Hole 11 Details | |
|---|---|
| Metres | Par |
|
381
Teeing off from one of the highest points on the course, sweeping views of Narrabeen Lake can be enjoyed before tackling arguably one of the most challenging par 4’s at Cromer. |
4 |
Teeing off from one of the highest points on the course, sweeping views of Narrabeen Lake can be enjoyed before tackling arguably one of the most challenging par 4’s at Cromer.
Out of bounds left and tall trees lining the entire hole to the right, make this one of the most testing tee shots on the course.
Long hitters will generally carry the right hand fairway bunker however it serves to further intimidate from the tee.
Once on the fairway a downhill second shot to a long and relatively flat putting surface awaits. Shots played short and to the right of the green face difficult pitches. Two bunkers protect the left side and back right impositions.
Please turn up your volume and click on play to hear how to play this hole:
Cromer Golf Club Course Tour – 12th Hole from Cromer Golf on Vimeo.
| Hole 12 Details | |
|---|---|
| Metres | Par |
| 423 | 4 |
An accurate drive to the left-centre of the fairway will soften this demanding par 4. Tall, imposing trees to the right of the fairway will prevent wild players making progress forward. Longer hitters can weave their drives between the bunkers that guard both sides of the fairway.
From the fairway an uphill second shot will require an extra club to reach the long green. The green is protected by gentle bunkering to the right and to the left. Approach shots that miss to the right, or short, will suffer the humiliation of a long roll to the bottom of the hill.
Once on the putting surface, putting is relatively straightforward. Very subtle breaks, typical of Cromer, are there to catch the unwary player.
Please turn up your volume and click on play to hear how to play this hole:
Cromer Golf Club Course Tour – 13th Hole from Cromer Golf on Vimeo.
| Hole 13 Details | |
|---|---|
| Metres | Par |
| 390 | 4 |
This short par 4 offers an excellent birdie opportunity. Long hitters can take on the green from the tee, however this requires a very high flighted drive over a gentle dog-leg left fairway. The conservative player will position the tee shot short of the cross bunkers and to the right of the fairway, leaving a short second shot to the green.
A careful club selection at the green is required to avoid landing on the steep front area of the putting surface. Any shots pulled left and long will certainly meet with a wet ending as the pond awaits.
Please turn up your volume and click on play to hear how to play this hole:
Cromer Golf Club Course Tour – 14th Hole from Cromer Golf on Vimeo.
| Hole 14 Details | |
|---|---|
| Metres | Par |
| 314 | 4 |
Take a moment on this tee to enjoy the views of Narrabeen Lake before teeing off at this demanding par 3.
Two bunkers are carefully positioned for shots pulled short left of the green, hazard protects the back, left and right side ready to catch any loose shots.
Distance control from the tee is crucial into this green to avoid negotiating the difficult rise in the middle section.
Putting on this green is made more difficult by a mound positioned in the centre. Players on the wrong side of the mound will need a surgeon’s touch to two-putt across this green.
Please turn up your volume and click on play to hear how to play this hole:
Cromer Golf Club Course Tour – 15th Hole from Cromer Golf on Vimeo.
| Hole 15 Details | |
|---|---|
| Metres | Par |
| 170 | 3 |
The 16th holds endless possibilities, and with them a number of possible scoring outcomes.
A hazard lines the entire length of the hole to the left leaving only the bold to strike their tee shot in the ideal left centre position of the fairway. Long hitters may attack this green in two shots, however a creek guards any shots short, and a pond to the right will catch out sleepy players.
The conservative play from the fairway is to lay up just short of the fairway bunker, leaving a relatively easy shot to the green.
The sixteenth green is bunkered left and short right. Shots missing long right and long left make pitching very difficult to a raised green. Once on the green, gentle slopes are relatively easy to read.
Please turn up your volume and click on play to hear how to play this hole:
Cromer Golf Club Course Tour – 16th Hole from Cromer Golf on Vimeo.
| Hole 16 Details | |
|---|---|
| Metres | Par |
| 480 | 5 |
This par 4 is demanding in every aspect. From the tee the creek stretches the width of the fairway. Longer hitters will need a long iron or hybrid to avoid running out of fairway.
Positioning the tee shot centre or to the right will prevent being blocked by the left side trees.
The second shot plays to an uphill green requiring half a club more than the yardage suggests. Careful attention should be paid to noting the pin placement here, as a shot left-short to a back pin will require superhuman efforts to 2 putt.
The green is very undulating and is protected by bunkers short, long left and long right.
Once on the putting surface, expert putting is required to negotiate a tier and late breaking putts.
Please turn up your volume and click on play to hear how to play this hole:
Cromer Golf Club Course Tour – 17th Hole from Cromer Golf on Vimeo.
| Hole 17 Details | |
|---|---|
| Metres | Par |
| 370 | 4 |
The final hole of the day will require your full attention in selecting an appropriate club. A meandering creek hugs the left and front of the green, as well as two deep bunkers protecting the right side. Careful club selection will allow for a slight uphill putt. The relatively severe breaks certainly require the approaching shot to finish below the hole.
Please turn up your volume and click on play to hear how to play this hole:
Cromer Golf Club Course Tour – 18th Hole from Cromer Golf on Vimeo.
| Hole 18 Details | |
|---|---|
| Metres | Par |
| 161 | 3 |
